Let’s talk about that sinking feeling. You’ve just spent 20 minutes creating a magnificent Class II composite. The anatomy is a work of art. Then, you check the bite… and it’s high. You proceed to spend the next 10 minutes grinding away your beautiful work, turning a masterpiece into a flat, ugly, and now unprofitable mess.
If this sounds familiar, it’s not because your patients are “picky.” It’s because you lack a systematic protocol for occlusion.
Most dentists waste a huge amount of chair time “chasing the bite,” which destroys anatomy and kills profitability. Today, we’re changing that. This is a 3-phase protocol that moves occlusion from a frustrating afterthought to an integral, predictable part of your restorative process.
Phase 1: Pre-Anesthetic Intelligence Gathering
The biggest mistake dentists make is treating every prepared tooth like a blank canvas. The reality is, most of our daily dentistry must be conformative, fitting seamlessly into the patient’s existing bite.
The solution is to gather all your occlusal information before you ever pick up a syringe. You must know your destination before you start the journey.
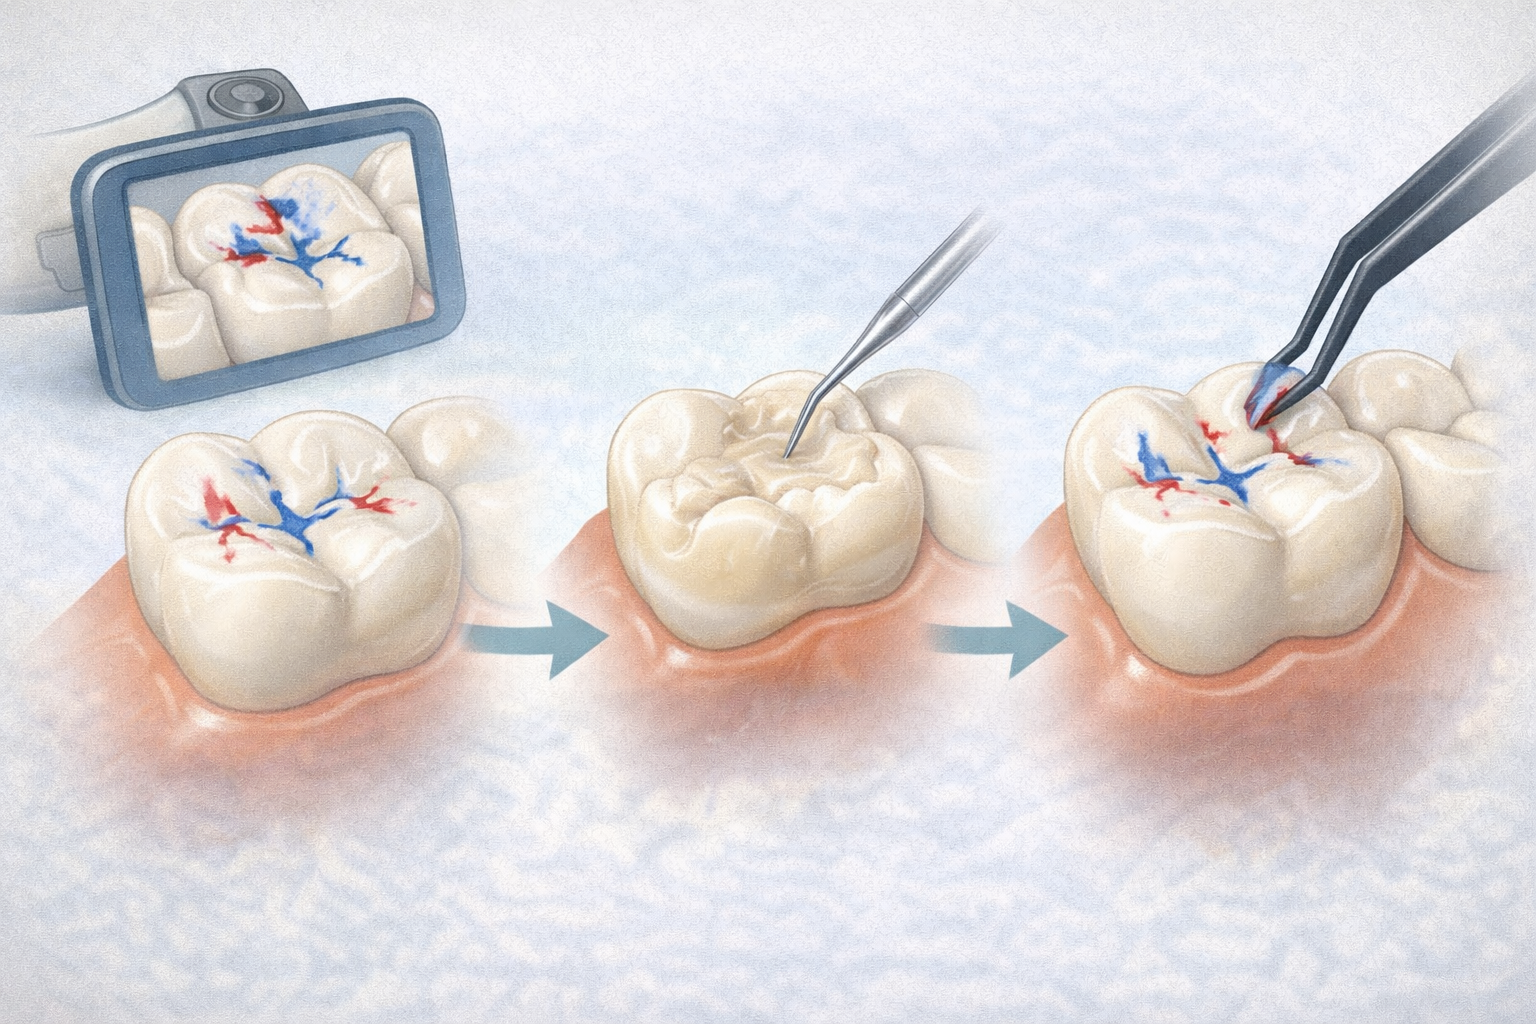
- Mark the Map: Before numbing, use articulating paper to mark the patient’s existing occlusal contacts on the tooth to be restored and its neighbors.
- Take a Picture: Snap a clear intraoral photo of those marks. This is now your roadmap.
- Study the Wear Facets: Especially for grinders, analyze their existing wear patterns. They aren’t “picky”; their neuromuscular system is incredibly fine-tuned. Your job is not to fight their occlusion; it is to precisely replicate it.
Phase 2: “Anatomic Referencing” During the Restoration
Stop guessing where the anatomy should go. Your guide is sitting right next to the prep.
- The Marginal Ridge is Your Ceiling: The height of the adjacent marginal ridge is your absolute limit. Use your explorer to ensure your restoration is perfectly flush. A high marginal ridge is a guaranteed food trap and patient complaint.
- Become a “Slope-Copier”: Use your explorer to visually and physically trace the angles of the wear facets and cusp inclines on the neighboring teeth. Transfer those exact same slopes to your composite as you sculpt. You are not creating random, pretty anatomy; you are reverse-engineering the patient’s functional pathway.
This proactive approach is far superior to overfilling and grinding everything back down. It turns a mundane procedure into an engaging challenge: can you create a restoration with zero adjustments?
Watch the full breakdown of this time-saving occlusal protocol.
Phase 3: The Multi-Sensory Audit (Sight, Sound & Touch)
The final verification is where most dentists fall short. Relying on one sense is a recipe for failure. And the biggest amateur mistake? Asking a numb patient, “How does that feel?” They have no idea. Their feedback is unreliable.
Instead, you must use your own three senses.
1. SIGHT
Analyze the articulating paper marks. Use thin paper. Learn to distinguish a true, pinpoint centric stop from a false “smear” mark. If you see a big blue mark on a non-functional cusp incline, you know to ignore it. Focus only on marks that correspond to true, functional contacts.
2. SOUND
This is a powerful and underutilized tool. Take the paper out and have the patient tap their teeth together firmly. Listen.
- A harmonious bite makes a crisp, solid, satisfying “thud.”
- A single high spot creates a duller, single-point “thwack.”
Once you train your ear, you can often diagnose a high spot with your eyes closed.
3. TOUCH
This has two parts.
- Shimstock/Paper Drag: Check the “hold” on the adjacent, untouched teeth. Then, check the hold on your new restoration. The drag should feel equal. If the paper holds tight on your new filling but pulls through on the neighbors, you are still high.
- Fremitus: Place your fingers on the buccal surfaces of the teeth in that quadrant and have the patient tap. You should feel a light, evenly distributed vibration. If you feel a disproportionate “jolt” on the tooth you just restored, you need to adjust it further.
By implementing this 3-Phase Protocol, you transform your restorative appointments from a frustrating grind-fest into a smooth, predictable process. You’ll save an immense amount of time and stress, deliver a better clinical result, and, most importantly, stop grinding away your hard-earned profit.